My creations - Mis creaciones

My creations - Mis creaciones
Showing posts with label TUTORIALS. Show all posts

Tuesday, April 1, 2014

Mitten's Pattern - English Version


Edit: I put in new pictures as the ones before did not show the true colors, the light is being really bad these days, cloudy and rainy, dark . . . 

Hello !! 

FINALLY !!! Here is the pattern, English version though. 
I will put the Spanish version up in the next few days !!

This weekend as I was trying to make this post I though I really, really wanted a pair of cream 
mittens. Pure cream ones. 
However as I started I was looking at this other colours and my mittens suddenly started evolving into these: 


Colours used in this pair are: 

Cream - 03
Soft Pink - 042
Raspberry Pink - 054
Aqua Green - 072
Blueish Green - 073

Available at my little Etsy yarn shop 
EDIT: I forgot to mention that I have new shipping prices, peak a look!


This is my first 'real' pattern, so please be kind and if you find any mistakes please let me know and I will correct the pattern.

Tuesday, May 28, 2013

Fabric Pin Cushion TUTORIAL


Hello !!
I have been a busy bee crafting, specially over the weekend. I will show you all is going on around here in another post. I really cannot blog at the same speed as life happens, 
I dont know how some bloggers can blog nearly everything they get to make. Just the pictures take forever to make them nicer (mind you I take mine with a mobile phone, I will have to ask Santa for a good proper camera at Christmas . . . )

Ok, finally I can bring you how I make these pin cushions. These are all over blogland, but I have not seen a blog tutorial as yet, so there you go.

Hola !!
He estado muy ocupada haciendo varias cosas, especialmente el fin de semana. Os enseñare todo en otra entrada. Yo no se como hacen algunas blogueras, pero yo no puedo bloguear todo lo que hago, no me da tiempo. Solo el organizar las fotos me lleva mucho tiempo (pero claro mis fotos son hechas con móvil y necesita mucho retoque para que queden medianamente presentables, le voy a pedir a los Reyes una cámara nueva en Navidad, a ver si cae la breva)

Finalmente os he podido traer el tutorial de como hago yo estos alfileteros. Los habreis visto por muchos blogs, pero yo aun no he visto un tutorial en fotos de como hacerlos, asi que aqui lo tenéis


You will need:
  • 2 fabrics of your choice (contrasting, matching or just the same fabric is up to you)
  • Fabric erasable Pen or marker
  • Scissors
  • machine sewing thread (I have used DMC) and sewing machine (you can also do it by hand though)
  • embroidery thread
  • 2 buttons (I forgot this when I made the picture)
Necesitareis:
  • 2 trozos de tela de vuestra elección (que contrasten, que peguen o la misma tela, lo que mas os guste)
  • Boligrafo de tinta soluble especial para tela
  • Tijeras
  • Hilo para maquina de coser y maquina de coser (aunque como es pequeño también se puede coser a mano)
  • Hilo de bordar (yo he usado DMC)
  • 2 botones (aunque me olvide de ponerlos al hacer la foto)
Country Maison- Pin Cushion

Now, let me tell you about my latest discovery in blogland. This pen pictured above is called Frixion by Pilot and it costed me 2.5 Euros in the One Euro Store.
And it is magic !!!
You mark the fabric, iron over and ink magically disappears !!! It is just great for embroidery, marking fabrics, etc.

Ahora, dejadme contaros mi ultimo descubrimiento en el mundo de los blogs. Este boli de la foto de arriba se llama Frixion y es de Pilot. Me costo 2.5 Euros y lo compre en los chinos, pero seguro que lo venden en papelerias, etc (aunque yo aun no lo he visto)
Es magico!!
Pintas la tela, planchas por encima y la tinta desaparece como por arte de magia !! Es genial para bordar sobre un dibujo, marcar tela, etc.


Let's make the pattern for the pin cushion. I used this terracota plate, depending on the diameter of the circle you use the pin cushion will be smaller or bigger. You can use plates, cups, anything that is round.

Hagamos el patron para el alfiletero. Yo use este plato de barro, depende del diametro del circulo que uses el alfiletero sera ms grande o mas pequeño. Puedes usar cualquier objeto redondo, platos, tazas, etc.

Country Maison- Pin Cushion

Country Maison- Pin Cushion

Cut the drawing you just made. I used these scissors to stop the fabric from fraying. Leave a border (1/4 of an inch is enough) as you will be sewing right on the pen mark.

Cortar el circulo que acabais de hacer. Yo use estas tijeras para evitar que se me deshilache la tela. Deja un borde (con medio centimetro vale) ya que coseras justo sobre el dibujo con boli.

Country Maison- Pin Cushion

You will need 2 circles like this, one for the top and another for the bottom, with the fabrics of your choice. Place the 2 fabrics with right sides facing each other. I have used these Lecien fabrics I showed here. 

Necesitaras 2 círculos de tela, uno para la parte de arriba y otro para la parte de abajo.  Poner las dos telas juntas para coserlas, el derecho con el derecho. Yo he usado estas telas de Lecien que os enseñe aquí.

Country Maison- Pin Cushion Tutorial

Pin them together to secure them while machine sewing

Pon alfileres para que no se muevan mientras los coses.


Country Maison- Pin Cushion Tutorial

Now go to the sewing machine and stitch together.

Ahora coselos a maquina.

Country Maison- Pin Cushion Tutorial

Make sure you leave a gap to turn it inside out and introduce the filling. 

Asegurate de dejar un trozo sin coser para darle la vuelta e introducir el relleno.

Country Maison- Pin Cushion Tutorial


Iron over it . . . see ?? the ink is gone !!

Planchalo . . .veis ?? la tinta ha desaparecido !!


Turn it inside out, it should look like this (picture below)

Dale la vuelta, y deber quedar como la foto de abajo


Ooops !! this picture below came out horrible !! Sorry . . . 

Ay, ay, ay !! esta foto de abajo salió horrible !! Perdón . . .


Iron over it to make it nice . . .

Planchalo de nuevo, al darle la vuelta se vuelve a arrugar . . .

Country Maison- Pin Cushion Tutorial

Fill it with lots of pillow filling, or anything you normally use for cushions, pillows, soft toys, etc

Rellenalo con relleno sintetico para almohadas o cojines, o algodón del de toda la vida

Country Maison- Pin Cushion Tutorial

 When you are happy with its fluffiness then close the opening you left before, hand stitch it to close it.

Cuando tengas el relleno que te gusta, da unas puntadas a mano para cerrar el agujero por donde hemos rellenado.

Country Maison- Pin Cushion Tutorial

Take now the embroidery thread, I use 4 strands of thread.  
Now find the centre of the cushion.

Ahora enhebra la aguja con hilo de bordar (el de punto de cruz). Yo he usado 4 hebras.
Pincha en el centro del alfiletero.

Country Maison- Pin Cushion Tutorial

Take the needle back from below and enter it again from above. You will have created a 'petal' or section , pull tight and repeat until you have about 8 petals or sections (this depends on the size of the cushion and your taste). 

Coge la aguja por abajo y vuelve a meterla por arriba. Habrás creado un pétalo o sección, tira del hilo para marcar el pétalo y repite esta operación hasta que tengas 8 'petalos' o secciones (depende del tamaño del alfiletero y de tu gusto)

Country Maison- Pin Cushion Tutorial

Country Maison- Pin Cushion Tutorial

Country Maison- Pin Cushion Tutorial

Now find a button for the top . . . 

Ahora busca un botón para la parte de arriba. . .

Country Maison- Pin Cushion Tutorial

And another for the bottom. . . 

Y otro para la parte de abajo . . .

Country Maison- Pin Cushion Tutorial

Remove the buttons and enter a needle with the thread of choice to sew the buttons.

Aparta los botones y mete una aguja con el hilo con el que vayas a coser los botones.

Country Maison- Pin Cushion Tutorial

Take the top button and introduce the needle with threat at this point, go through the cushion all the way to the button and enter the needle through the top button too. 

Luego pasa el botón de arriba por la aguja y a través del alfiletero y coge al mismo tiempo el botón de abajo. Si los haces coincidir es mas fácil coser los dos al mismo tiempo. 
Country Maison- Pin Cushion Tutorial

Continue like this until the 2 buttons are secured. Fasten off and secure de thread before cutting it when you are finished. 

Continua cosiendo los botones hasta que esten asegurados. Remata y corta el hilo

Country Maison- Pin Cushion Tutorial

and we have these beautiful pin cushions !!!

y tenemos nuestro precioso alfiletero !!

Country Maison- Pin Cushion Tutorial

You can also make tiny ones and adorn hair bands or a brooch or an ornament for a bag, anything really, it only depends on the size you make it. 
If you are into crochet it is the same method, just make 2 crochet flat circles and then follow the same process as in here. 

I hope you make lots of these !!!

Have a nice week ahead !!

También podeis hacer pequeñitos y usarlos para adornar gomas de pelo, o diademas, o bolsos, cualquier cosa, solo depende de que tamaño lo hagáis y le podéis dar un uso u otro. 
Si os gusta el crochet, es el mismo metodo, hacéis dos círculos planos en ganchillo y seguis los mismos pasos que para este de aqui. 

Espero que hagais muchos de estos !!!

Que tengáis una feliz semana !!


Saturday, May 11, 2013

Sweet Crochet Flower : TUTORIAL

countrymaison.blogspot.com
Hello dears ! 
I have dared to make a tutorial of a very simple flower I made to embellish the crocheted mobile case I made for Mother's Day last week.

Hola queridas !
Me he atrevido a hacer el tutorial de esta sencilla flor que hice para adornar la funda de móvil que hice para el Dia de la Madre la semana pasada. 

If you read my last post you could see that I got the inspiration from the blog A World of Imagination and the pattern for the case itself. You can also find a similar pattern here, in Issuu, a great find if you don't already know it. You can find magazines and free e-books. 

Si habéis leido mi ultima entrada visteis que la inspiración vino del blog A World of Imagination asi como el patron para la funda. Tambien podeis encontrar un patron parecido aqui (aunque en ingles). Isuu es muy útil y os animo a que echéis un vistazo. 
Para las que no entendéis ingles el patrón es basicamente hacer una cadeneta alrededor de tu móvil para ver el tamaño que necesitáis. Una vez la tengáis es hacer filas consecutivas de punto bajo hasta llegar al numero de vueltas que os haga falta para que cubra la longitud del móvil. Se cosen la costura de la parte de la cadeneta y el lateral con una aguja de lana y la misma lana utilizada. Luego se hace el borde que consta de 3 puntos bajos en un mismo punto, repitiendo esto en toda la vuelta. 

You can also use the Sweet Flower to adorn hair clips or hair bands, etc, bags, purses, garlands, etc, etc. 
Also in my last post I mentioned that for the leaves I followed Attic24 May Roses pattern. 


También podeis usar la Sweet Flower para adornar pinzas de pelo, gomas o diademas, bolsos, carteras, banderolas, etc
También en mi ultima entrada mencione que para hacer las hojas use el patrón de Attic24, May Roses. 

The Sweet Flower is reeeelly simple  and I've hesitated a lot about doing this tutorial, again,  but then I thought that even if it's really easy it might be of good use to someone who is learning to crochet. I hope it does help some of you and that you all like it. 

Esta flor es muuuuy sencilla y he tenido mis dudas sobre si hacer o no un tutorial, de nuevo, pero después pensé que aunque es muy fácil le puede venir bien a alguien que este aprendiendo. Espero que le sirva a alguien y que os guste a todas. 


countrymaison.blogspot.com

First make a slip knot

Empieza con un nudo corredizo

countrymaison.blogspot.com

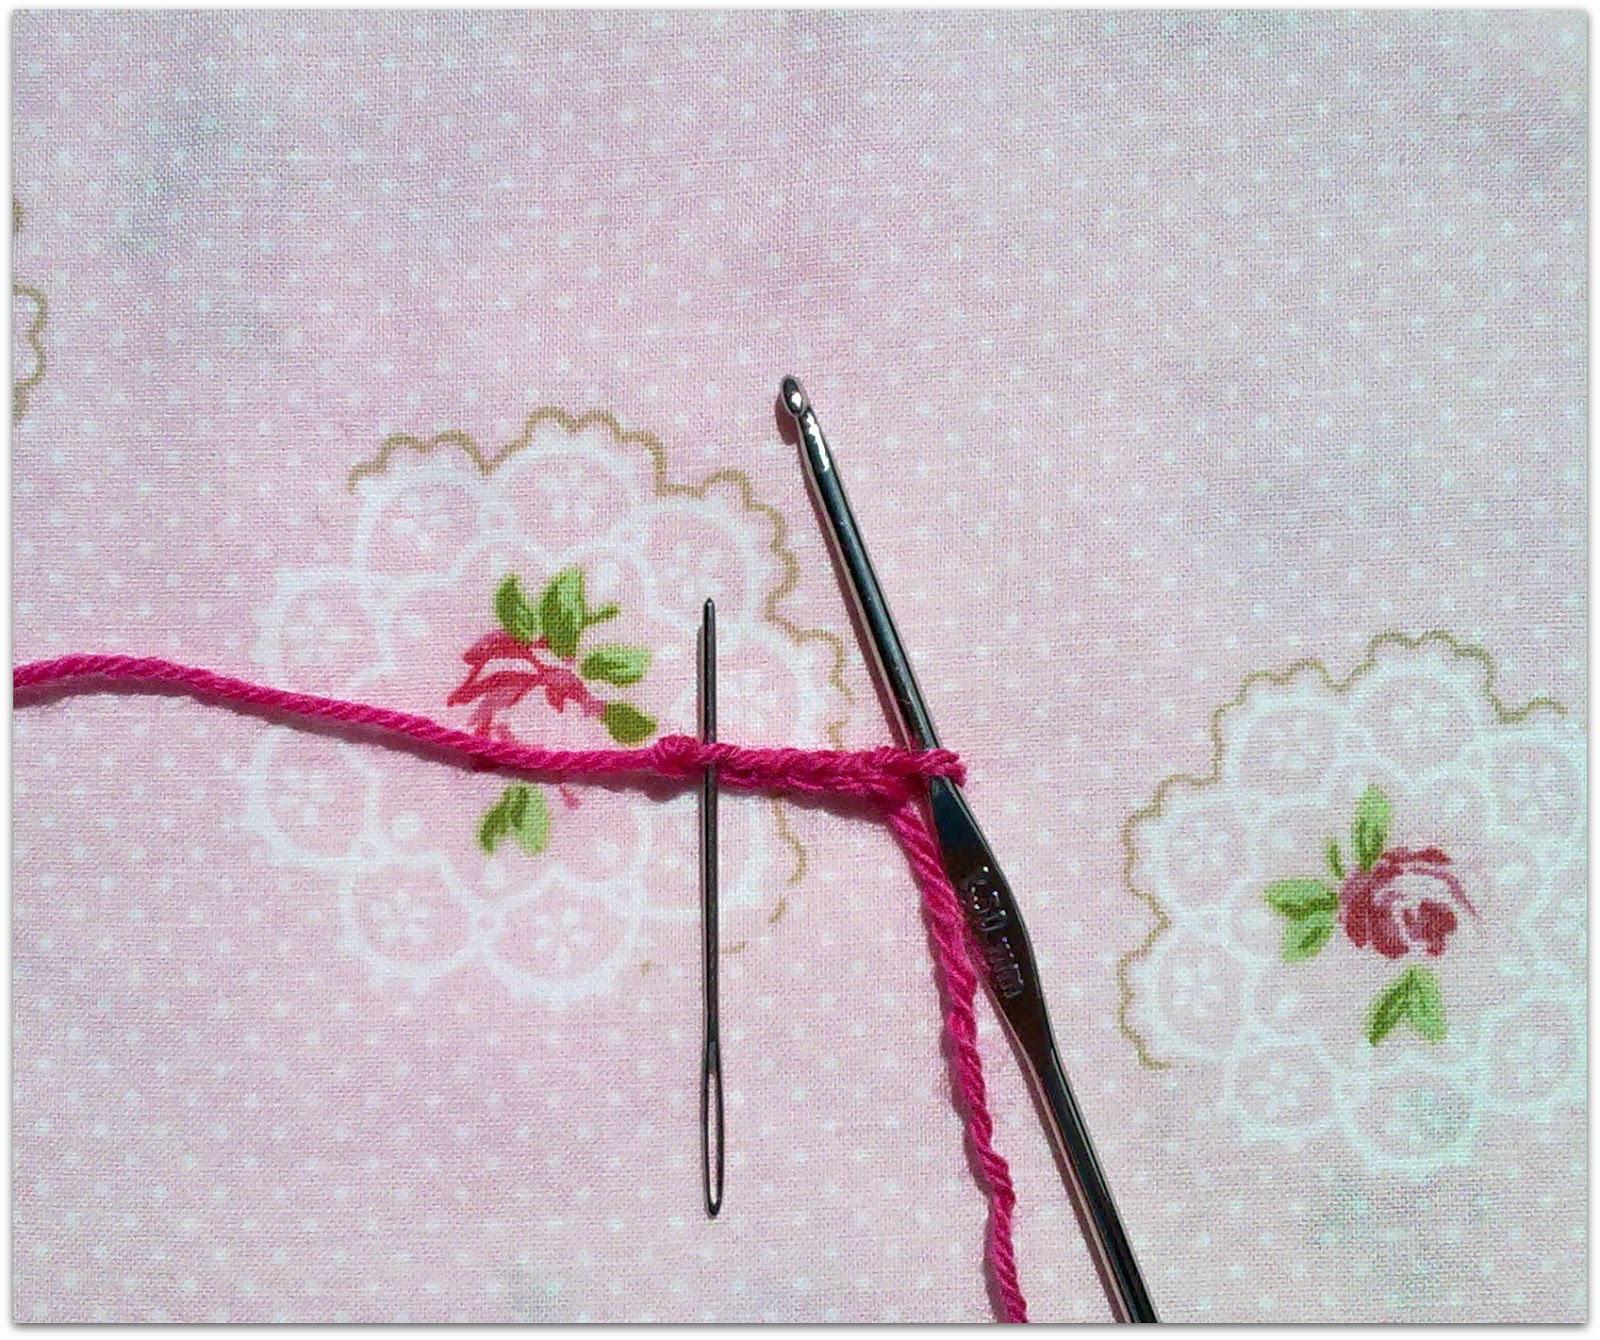
Make 6 chain stitches

Haz 6 puntos de cadeneta

countrymaison.blogspot.com

Slip stitch  in the first chain stitch you made, where I have my yarn needle.
Cierra la cadeneta con un punto bajo en la primera cadeneta, donde señalo con mi aguja de lana.

countrymaison.blogspot.com

Now make 15 single crochet (U.S) or double crochet  (UK) in the circle created with the 6 chain stitches. 

Ahora haz 15 puntos enanos alrededor del circulo formado por la cadeneta de 6  puntos.

countrymaison.blogspot.com

 It should look like this (picture above).  

Debería quedar como la foto de arriba.

countrymaison.blogspot.com

Slip stitch in the first SC (DC for UK) you made in the round.

Cierra el circulo con un punto enano en el primer punto bajo que hiciste en la vuelta.


countrymaison.blogspot.com

Make 3 chain stitches. 
(Sorry about this picture above, not sure why it came out so 'different')

Haz 3 puntos de cadeneta.
(Perdon por la foto de arriba no se porque ha salido tan 'diferente)

countrymaison.blogspot.com

Skip one, and slip stitch into the next. . . 

Saltate un punto y une la cadeneta al circulo de puntos bajos con un punto enano

countrymaison.blogspot.com

 Now make 3 chain stitches and slip stitch into the second one, 7 more times.
We should get 8 chain 3 spaces that will be the base of our petals. 
(Please note that it also looks nice with only 6 petals, so feel free to make just 6 or 8 as you like)

    Ahora haz 3 cadenetas y unelas al circulo con un punto enano en el segundo punto, repite 7 veces.
Debemos tener 8 espacios de cadenetas de 3, que serán la base para los pétalos. 
(También queda bonita con 6 pétalos, así que puedes hacer 6 u 8 pétalos, como mas te guste)

countrymaison.blogspot.com

Once you finish all the chain 3 spaces, slip stitch into the first chain of the first chain 3 set you made in the circle. 

Una vez acabes de hacer todas las cadenetas de 3, une la ultima con un punto enano a la primera cadeneta del primer set de 3 que hiciste en el circulo. 

countrymaison.blogspot.com

 Now we are ready to start our petals

Ahora estamos preparadas para empezar los pétalos 

countrymaison.blogspot.com

 Insert the hook into the first chain 3 space and do: 1 SC (DC for UK), 3 DC (3 trebles for UK), 1 SC

En cada espacio de 3 cadeneta, haz lo siguiente: 1 P.Bajo, 3 Altos, 1 P.bajo

countrymaison.blogspot.com

And repeat this into each chain 3 spaces. You should get 8 petals in total. 

Repite esto en cada espacio de 3 cadenetas. Deberás tener 8 pétalos al final

countrymaison.blogspot.com

Finish with a slip knot into the first SC you made for the first petal. 

Termina con un punto enano en el primer punto bajo que hiciste para hacer el primer pétalo.  

countrymaison.blogspot.com

Now you have your flower. Fasten off and wave in the ends. 
The size of your flower will depend on the yarn you use and the hook size. 
If you see anything wrong with this pattern or the tutorial please let me know, this is the first crochet tutorial I've ever made and so it is far from perfect. 


Ya tienes la flor. Ahora corta la hebra y remata.
El tamaño de la flor dependerá de la lana que utilizes y el numero de aguja. 
Si veis que algo no va con el tutorial por favor decidmelo, este es el primer tutorial de ganchillo que hago y esta lejos de ser perfecto. 

HAVE a NICE WEEKEND !!

Que tengais un FELIZ FIN DE SEMANA!!

You may also like:

Related Posts Plugin for WordPress, Blogger...